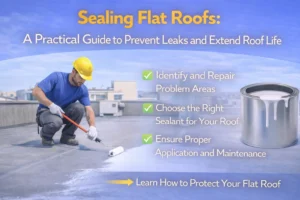
Sealing Flat Roofs helps protect your home or building from water damage. Flat roofs can hold water, not like sloped roofs which can cause leakages, cracks and more problems over time. Even small problems can turn into costly repairs if overlooked. Using to correct sealants makes your roof waterproof or prevents moisture from getting in and protects it from the sun’s damaging rays. Sealing to your roof also saves energy and extends its lifespan. This guide displays that how to seal a flat roof or what materials to use and offers easy step-by-step instructions which have your roof safe and strong for years.
Key Takeaways
-
Structural Integrity: Prevents water infiltration that leads to rot, mold growth, and weakened insulation by creating a seamless waterproof barrier.
-
Material Specificity: Critical matching of sealants (Silicone, Acrylic, or Liquid Rubber) to specific roof types like EPDM, TPO, or PVC to prevent peeling.
-
Surface Preparation: Emphasis on deep cleaning and repairing existing cracks or “blisters” before application to ensure the sealant bonds correctly.
-
Climate Protection: Utilizing UV-reflective coatings to block damaging sun rays, which lowers indoor temperatures and reduces energy costs.
-
Adhesion Strategy: Using specialized primers for rubber or plastic roofs to guarantee long-term durability and prevent the coating from lifting.
-
Maintenance Routine: Regular inspections for “ponding water” (standing for 48+ hours) and minor splits to stop small leaks before they require a full roof replacement.
-
Professional Judgment: Identifying when to DIY minor repairs versus hiring a specialist for complex roof layouts or severe structural damage.
Why Sealing Flat Roofs Is Important
Flat roofs face rain, sun, and bad weather each day. Water can stay on the roof and minor cracks allow it in, which is why many homeowners consult a professional roofing company virginia beach to assess the damage. This can cause mold or damage insulation and make the roof weak. Sealing the roof adds a strong layer of protection.
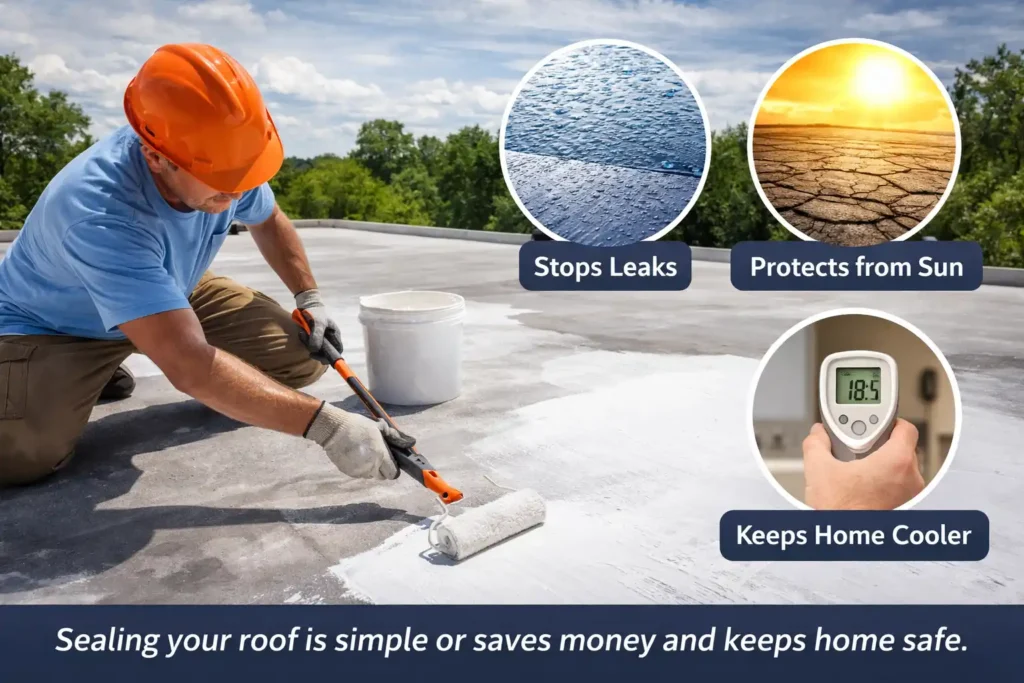
Benefits of Sealing Flat Roofs:
Stops Leaks: Has water out and keeps to your home dry.
Lasts Longer: The roof stays strong and requires fewer repairs.
Keeps Home Cooler: Blocks sunlight and lowers indoor heat.
Protects from Sun: Stops cracks or harm from the sun.
Sealing your roof is simple or saves money and keeps your home safe for a long time.
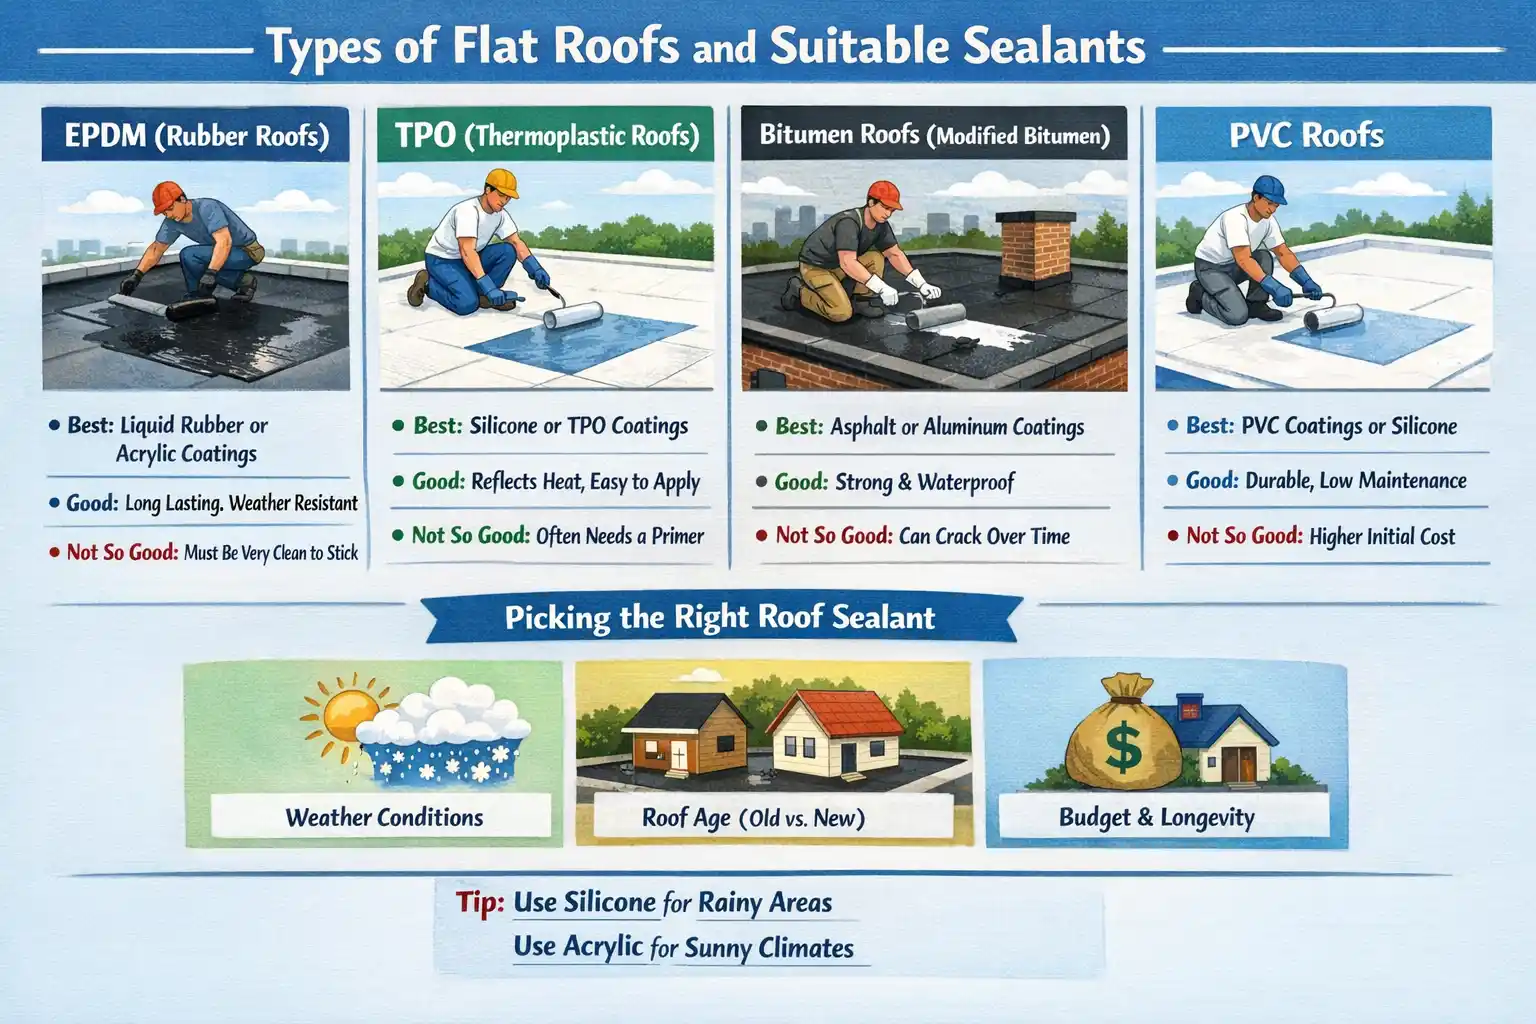
Types of Flat Roofs and Suitable Sealants
Not all flat roofs are alike. You want to choose a sealant that matches your roof material. Using the incorrect one can peel off easily and cause damage sooner.
1: EPDM (Rubber Roofs)
EPDM is a soft rubber frequently used on flat roofs.
Best sealants: Liquid rubber or acrylic coatings
Good: Lasts long and switches weather well
Not so good: The roof must be very clean for sealant to stick
2: TPO (Thermoplastic Roofs)
TPO roofs save energy and reflect heat.
Best sealants: Silicone or special TPO coatings
Good: Stands up to the sun, light to switch
Not so good: Some sealants want a primer to stick well
3: Bitumen Roofs (Modified Bitumen)
This is an asphalt roof frequently found on older buildings.
Best sealants: Asphalt or aluminum coatings
Good points: Strong and has water out
Bad points: Can crack if not looked after
4: PVC Roofs
PVC roofs last long and resist chemicals.
Best sealants: PVC-safe coatings or silicone
Good points: Long-lasting, wants little care
Bad points: Prices are higher at first
Picking the Right Roof Sealant
When selecting a sealant for a flat roof then must consider:
- The weather (rain, sun or snow)
- How old or new the roof is
- Your budget and how long you need it to last
Tip: Use silicone if your area gets a lot of rain. Use acrylic if you need to save money and protect from the sun.
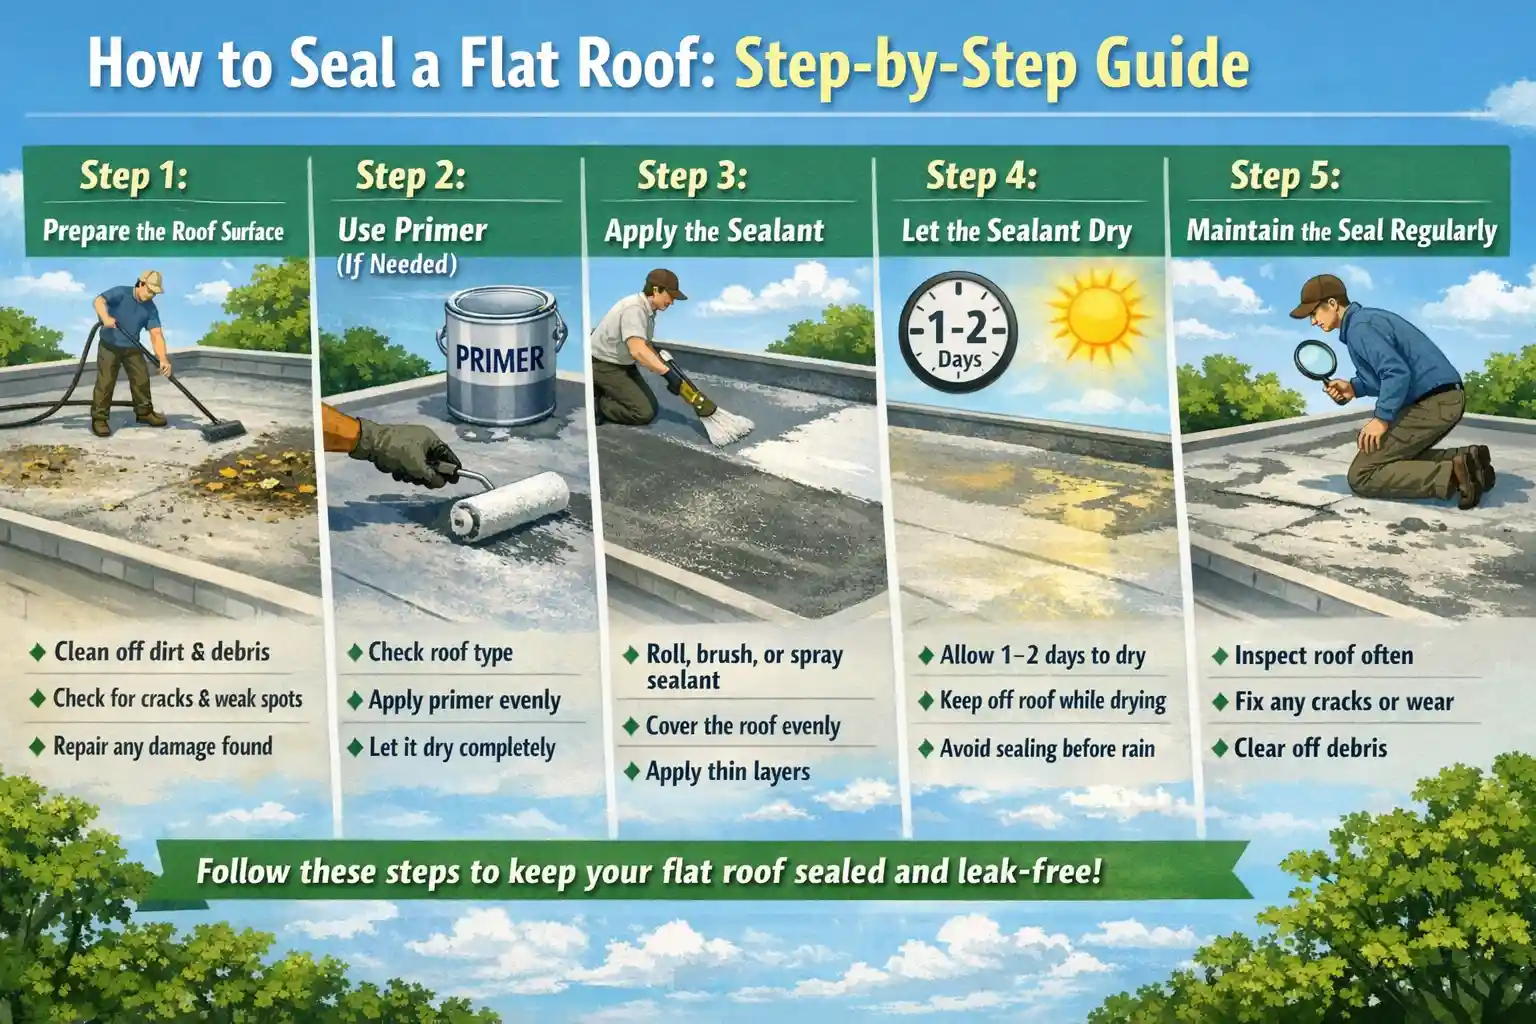
How to Seal a Flat Roof: Step-by-Step Guide
If you need to seal a flat roof yourself, then it’s key to follow the steps carefully. Missing any step can cause complications.
Step 1: Prepare the Roof Surface
Firstly, clean to your roof well. Use a broom or a pressure washer to remove dirt or leaves and loose debris. A clean roof supports the sealant stick well and lasts longer.
Check your roof for any problems:
- Look for flaws, holes or bumps
- Check edges and seams for weak spots
- Find areas where water gathers
Fix any damage previously caused by applying sealant. If you miss this then your roof may leak and the seal won’t last.
Step 2: Use Primer (If Needed)
Some roofs want a primer first. Primer helps the sealant stick and last longer. If you miss it, then sealant might come off or not protect the roof. Check your roof type to determine that if primer is required.
- EPDM or TPO roofs typically require primer.
- Bitumen roofs may not want it.
- Spread the primer equally on the roof.
- Wait for it to dry, previously putting on sealant.
Using primer makes the sealant stick well or keeps your roof safe for a long time.
Step 3: Apply the Sealant
Now, put the sealant on your roof. Make certain that the roof is clean or dry first. Cover each part so no spots are missed. Work gradually, doing one section at a time.
- Use a roller for big flat areas.
- Use a brush for edges and corners.
- Use a spray for even coverage.
Put on thin layers only. Thick layers may not dry. Doing it exactly stops leaks and keeps your roof safe.
Step 4: Let the Sealant Dry
Once the sealant is put on, let it dry or harden fully. Drying time depends on the sealant and the climate. Don’t rush this step or the sealant might peel or fail.
- Most sealants take 1–2 days to dry.
- Have roof dry and don’t walk on it.
- Avoid sealing previously wet rain.
Waiting for the correct time makes the seal strong and continues.
Step 5: Maintain the Seal Regularly
Sealing your roof is not a one-time job. To have it strong, then check it frequently. Check your roof every few months. Fix minor problems timely that prevent great damage later.
- Check for new cracks, holes and peeling
- Put sealant on worn or thin spots
- Have the roof cleaned of dirt or leaves and debris
Regular care keeps your roof harmless or lasts longer.
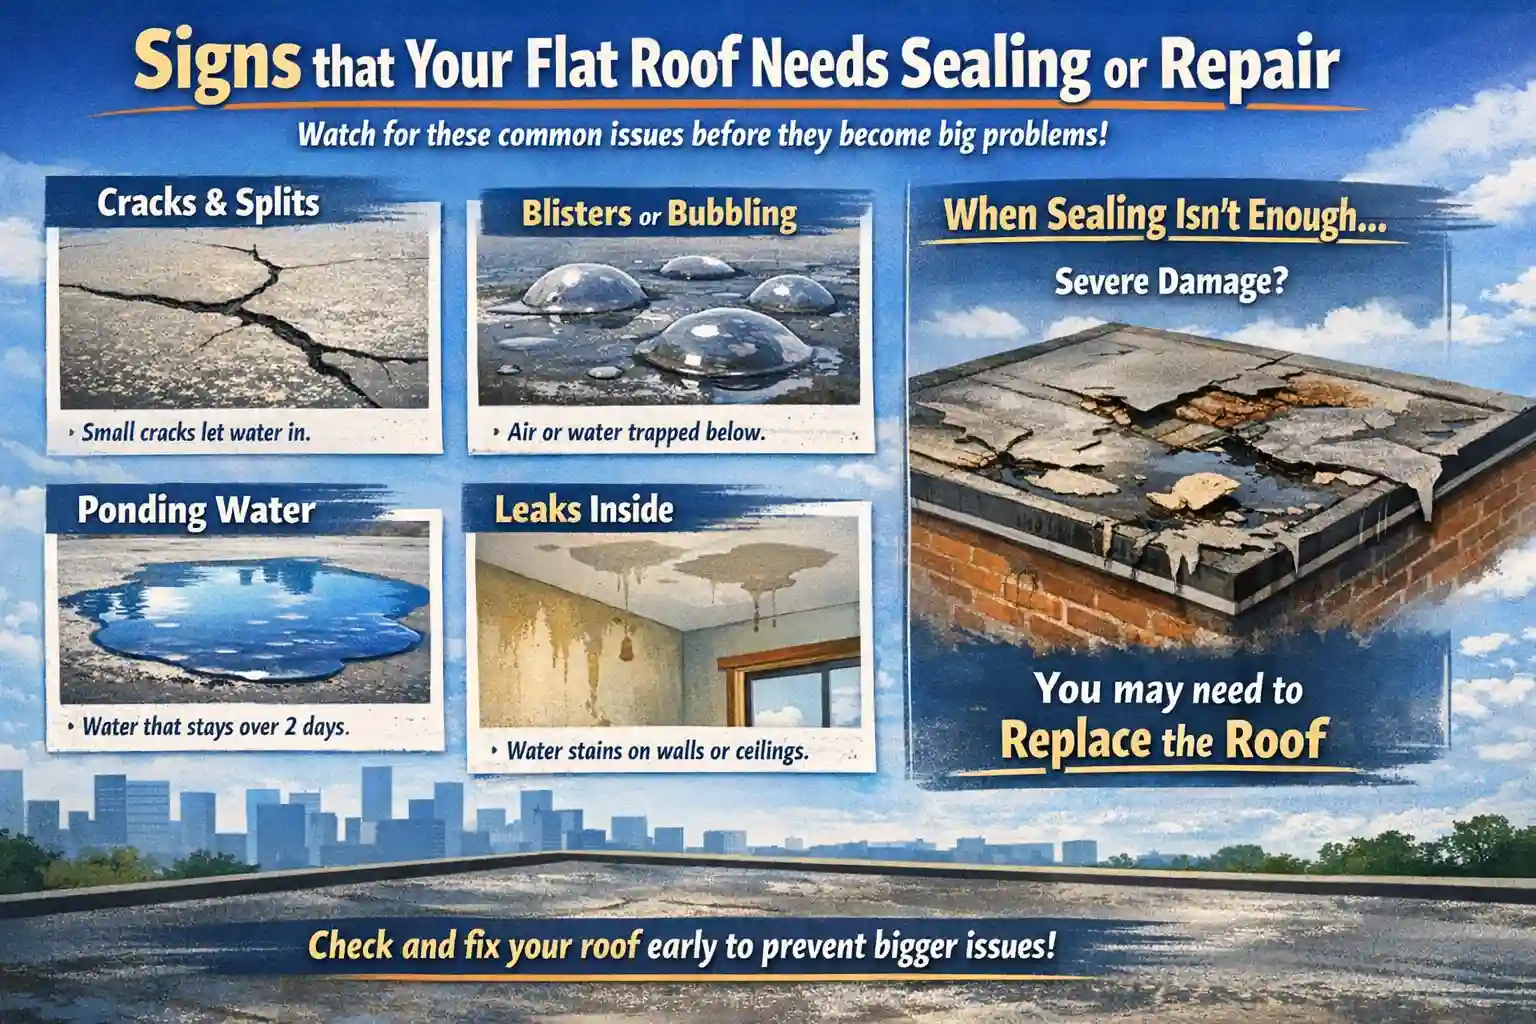
Signs that Your Flat Roof Needs Sealing or Repair
Watch your roof for cracks or bubbles and water that stays on top. Addressing these issues according to professional roofing standards can save you money. Check your roof frequently to stop small problems from becoming great ones.
Common Signs:
Cracks and Splits: Small cracks let water in and can get larger over time.
Blisters or Bubbling: The bubbles on roof mean air or water is trapped below which can weaken it.
Ponding Water: Water that stays on the roof for more than 2 days can cause leakages.
Leaks Inside: Water stains on walls or ceilings indicate that the roof seal is broken.
When Sealing Isn’t Enough: If the roof is severely damaged then you may want to replace part or all of it.
Checking and fixing your roof on time makes it durable and lasts for longer.
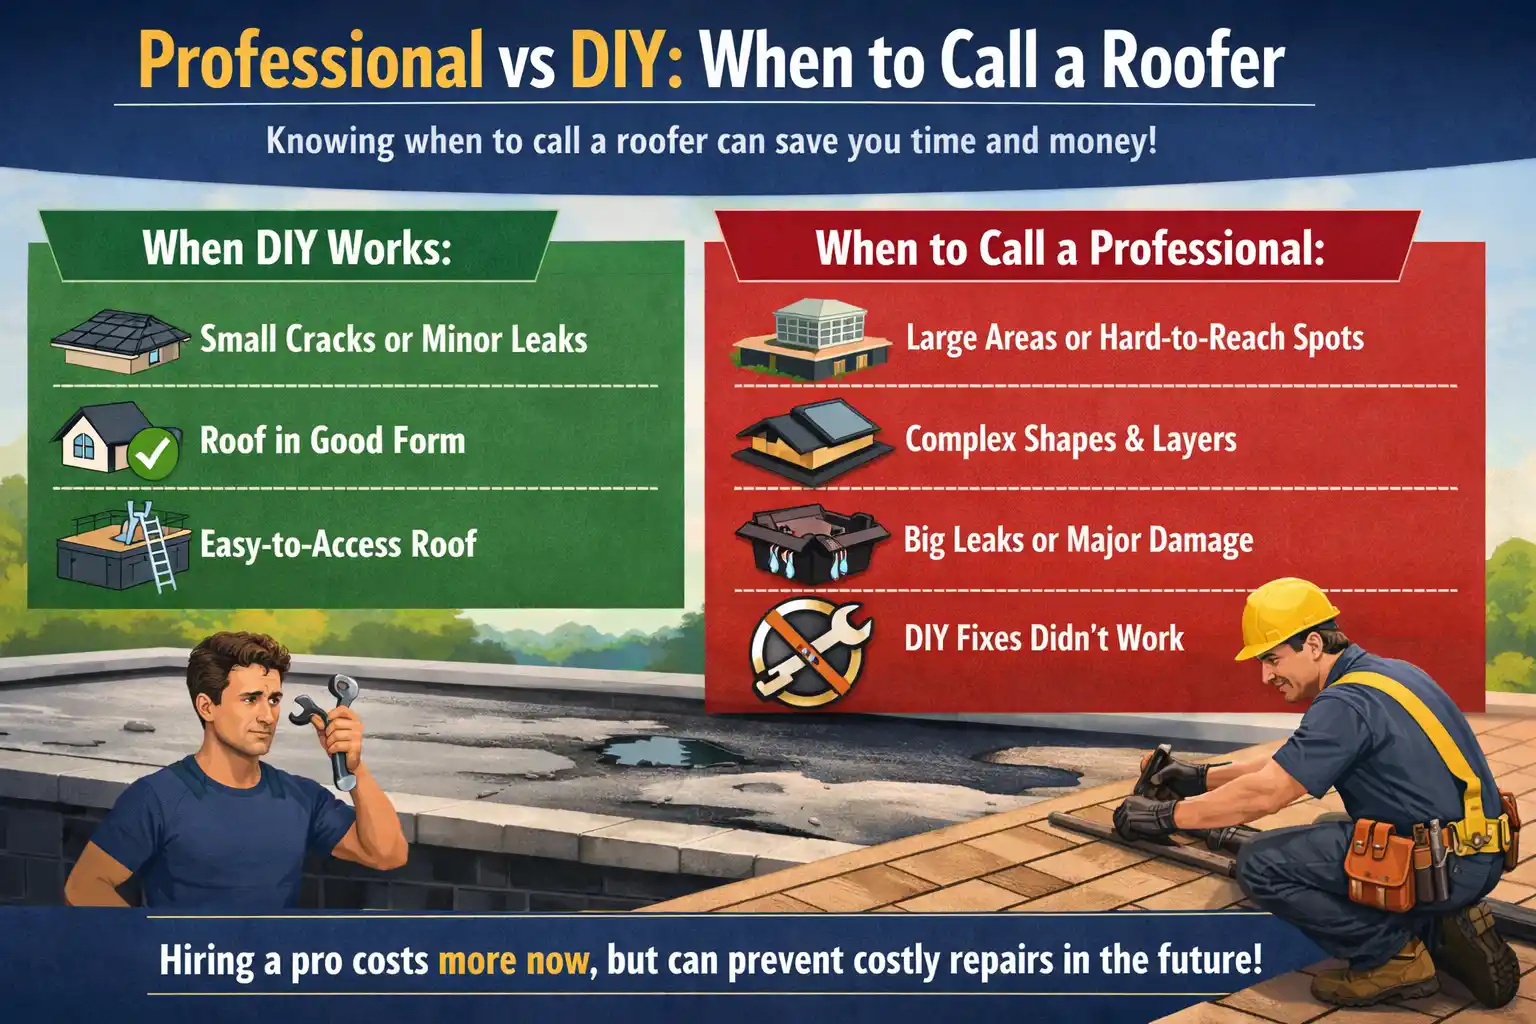
Professional vs DIY: When to Call a Roofer
Many homeowners can fix minor flat roof complications themselves but some jobs require a professional. Knowing to when to call a roofer can save you money and concern later. Small cracks or leaks on an easy-to-reach roof can be fixed at home. However, for greater problems, complicated shapes, or serious leaks, it is best to consult experts in flat roofing. In incorrect situation, trying DIY can cause more damage and repeated repairs.
When DIY Works:
- Small cracks or minor leaks
- Roof is in good form
- Easy-to-access roof
When to Call a Professional:
- Big roof areas or hard-to-reach spots
- Complex shapes or various layers
- Large leaks or roof damage
- DIY fixes have failed previously
Employing to a roofer costs more at first but it can save money later. A pro can do the job correctly or stop future leaks and make your roof last longer.
Final Thoughts
To conclude that sealing a flat roof is essential to stop leaks and prevent water damage. It can also save money on repairs or support your roof to last longer. Performing the regular inspections and applying the correct sealant at right time keeps your roof strong and energy-efficient. You can do it yourself or employ a professional but fixing minor cracks on time is much easier than waiting for more problems. Taking care of your roof or preparing it correctly and applying sealant cautiously will make it last longer. Following these steps will keep your flat roof safe or dry and protected for many years.